# Keep Your Compost Fresh and Odor-Free: Easy Tips to Prevent Sogginess and Smelly Bins for a Healthier Garden
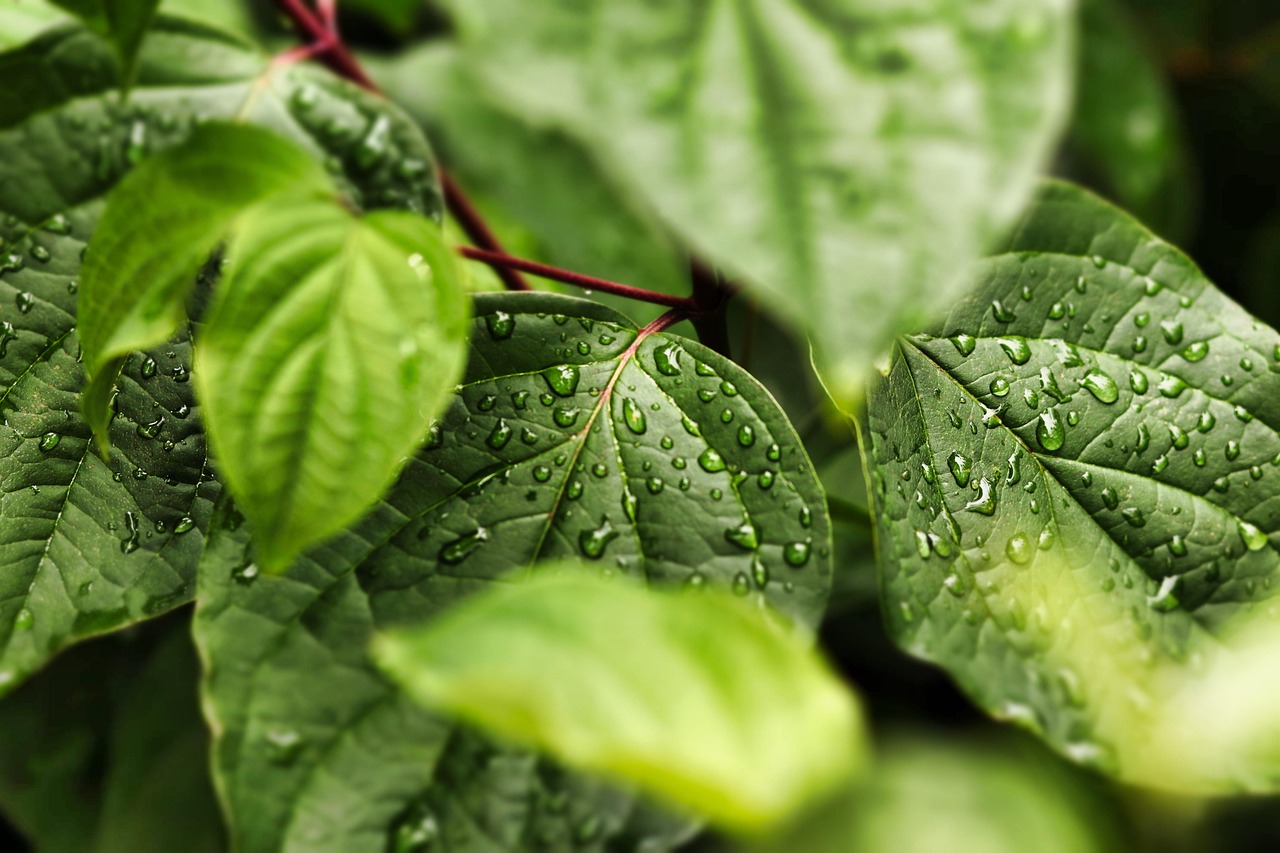
Composting transforms kitchen scraps and yard waste into nutrient-rich gold for your garden, but dealing with soggy, smelly bins can quickly turn this eco-friendly practice into a neighborhood nuisance.
Many gardeners abandon composting after experiencing unpleasant odors and slimy, waterlogged bins. The good news? These common problems are entirely preventable with simple techniques and proper maintenance. Understanding the science behind healthy decomposition empowers you to create beautiful, earthy-smelling compost that enriches your soil without offending anyone’s nose.
🌱 Understanding Why Compost Bins Go Wrong
Before diving into solutions, it’s essential to understand what causes compost problems. Most issues stem from an imbalance in the composting ecosystem, where beneficial microorganisms struggle to thrive due to unfavorable conditions.
Soggy compost occurs when excessive moisture drives out oxygen, creating anaerobic conditions. Without adequate airflow, helpful aerobic bacteria die off, and their anaerobic cousins take over. These oxygen-hating microbes produce foul-smelling compounds like hydrogen sulfide and ammonia during decomposition, creating that infamous rotten egg smell.
Temperature also plays a critical role. A healthy compost pile generates heat as microorganisms break down organic matter. When piles become too wet or too dry, microbial activity slows, decomposition stalls, and unpleasant conditions develop.
The Golden Ratio: Balancing Browns and Greens
The foundation of odor-free composting lies in maintaining the proper ratio of carbon-rich “browns” to nitrogen-rich “greens.” This balance determines whether your compost becomes a thriving ecosystem or a smelly mess.
Green materials include fresh grass clippings, vegetable scraps, coffee grounds, and other nitrogen-rich items that provide protein for microorganisms. Browns consist of dry leaves, shredded paper, cardboard, wood chips, and straw—carbon sources that give compost its structure and absorb excess moisture.
The ideal ratio is approximately 30 parts carbon to 1 part nitrogen by weight, though in practice, aiming for a 3:1 ratio by volume works perfectly for most home composters. When you add a bucket of kitchen scraps, add three times that volume in brown materials.
Best Brown Materials for Moisture Control
- Shredded cardboard: Excellent moisture absorber that breaks down readily
- Dried leaves: Abundant in fall and perfect for stockpiling year-round
- Wood chips: Provide structure and long-lasting aeration
- Sawdust: Fine texture absorbs liquids quickly (use untreated wood only)
- Straw or hay: Creates air pockets while absorbing moisture
- Shredded newspaper: Readily available and effective when mixed properly
💧 Moisture Management: The Key to Success
Proper moisture levels separate successful composters from frustrated ones. Your compost should feel like a wrung-out sponge—damp but not dripping. When you squeeze a handful, a few drops of water may appear, but it shouldn’t stream out.
Too much moisture creates the anaerobic conditions responsible for nasty smells. Too little, and decomposition grinds to a halt as microorganisms go dormant. Finding this sweet spot requires attention and occasional adjustments.
Quick Moisture Test
Grab a handful of compost from the middle of your pile. Squeeze it firmly. If water streams out, it’s too wet. If it feels dusty and won’t hold together, it’s too dry. Perfect compost holds together briefly, then crumbles when you release pressure.
Fixing Soggy Compost Fast ⚡
When your compost bin becomes waterlogged, immediate action prevents the situation from worsening. Soggy compost quickly turns anaerobic, producing the sulfurous odors that give composting a bad reputation.
Start by adding generous amounts of dry brown materials. Mix them thoroughly into the wet compost using a pitchfork or compost aerator tool. The browns act like sponges, absorbing excess moisture while introducing air pockets.
If your bin has become extremely soggy, consider temporarily spreading the compost on a tarp in a protected area where it can dry slightly. Turn it frequently to accelerate moisture evaporation. Once it reaches the proper consistency, return it to the bin with additional browns layered throughout.
Prevention Strategies for Wet Weather
During rainy seasons, protecting your compost from excess water becomes crucial. Cover open bins with a tarp or lid that allows some airflow while shedding rain. Create a slight dome shape on the top of your pile to encourage water runoff rather than pooling.
Installing your compost bin on a slight slope or using a bin with drainage holes at the bottom helps excess water escape. Some composters place a layer of small branches or wood chips at the bin’s base to improve drainage and air circulation.
🌬️ Aeration: Giving Your Compost Room to Breathe
Oxygen is the lifeblood of healthy composting. Aerobic bacteria—the beneficial microorganisms that create sweet-smelling, nutrient-rich compost—require constant oxygen supply. Without it, they suffocate, and stinky anaerobic bacteria dominate.
Turning or mixing your compost introduces fresh oxygen while redistributing moisture and heat. The frequency depends on your composting method, but most active piles benefit from turning every 7-14 days. More frequent turning accelerates decomposition but requires more effort.
Effective Aeration Techniques
Use a pitchfork or compost aerator tool to lift and turn material from the center outward. The center heats up most, so moving it outward ensures even decomposition. Bring outer material toward the center where it can heat up and break down faster.
For less labor-intensive aeration, insert perforated PVC pipes vertically into your pile or use a compost tumbler that makes turning effortless. Some composters add bulky materials like small branches that create natural air channels throughout the pile.
Temperature: The Silent Indicator of Compost Health 🌡️
A properly functioning compost pile generates significant heat—sometimes reaching 130-150°F (54-66°C) in the center. This heat indicates vigorous microbial activity and helps kill weed seeds and pathogens.
When compost becomes too wet, it can’t heat properly because water displaces air needed by heat-generating aerobic bacteria. Conversely, dry compost lacks the moisture microbes need to thrive. Both scenarios result in cool piles with slow or incomplete decomposition.
Investing in a compost thermometer helps you monitor pile health. If temperatures drop suddenly, it signals a problem—usually too much moisture, insufficient nitrogen, or lack of oxygen. Addressing these issues quickly prevents odor development.
What NOT to Compost: Avoiding Problem Materials
Certain materials create odor problems regardless of how well you manage your pile. Knowing what to exclude saves frustration and keeps your compost sweet-smelling.
Meat, fish, dairy products, and oils decompose slowly and attract pests while generating powerful odors. Even in hot compost piles, these materials often create anaerobic pockets that smell terrible. Stick to plant-based materials for trouble-free composting.
Pet waste from dogs and cats contains pathogens that survive most home composting processes. Diseased plants may spread problems to your garden when you apply finished compost. Chemically treated wood products can introduce toxins harmful to plants and soil organisms.
Materials That Cause Moisture Problems
- Excessive fruit waste: Very high water content; balance with extra browns
- Fresh grass clippings: Mat together and go anaerobic quickly
- Large vegetable pieces: Break down slowly and hold excess moisture
- Cooked foods: Often contain oils and attract pests
🪴 Size Matters: Chopping for Faster Decomposition
Smaller pieces decompose faster because they provide more surface area for microorganisms to colonize. Breaking down materials also prevents clumping and improves air circulation throughout your pile.
Chop kitchen scraps into 1-2 inch pieces before adding them to your bin. Shred or chop leaves and other yard waste. Break apart cardboard and tear paper into strips. This simple step dramatically accelerates composting while preventing soggy pockets where whole vegetables sit intact.
Whole items like apple cores, corn cobs, and large vegetable trimmings can take months to break down. Meanwhile, they create oxygen-depleted zones within your pile where anaerobic bacteria produce foul odors. A few minutes of chopping prevents these problems entirely.
Layering Technique for Odor-Free Bins
How you add materials to your compost bin significantly impacts odor control. The lasagna or layering method creates ideal conditions for decomposition while preventing smells from escaping.
Start with a 4-6 inch layer of coarse brown materials at the bottom for drainage and airflow. Add 2-3 inches of green materials, then cover immediately with 3-4 inches of browns. Continue alternating layers, always finishing with browns on top.
This final brown layer acts as a biofilter, trapping odors while they decompose. It also discourages fruit flies and other pests. Think of it as a compost blanket—every time you add greens, tuck them under a brown covering.
Strategic Placement of Kitchen Scraps
Rather than dumping scraps on top, create a small depression in your pile’s center, add the scraps, and cover them completely with browns. This buries odor-producing materials immediately while the browns absorb any liquid released during decomposition.
🦟 Pest Prevention Through Proper Management
Fruit flies, rodents, and other pests are attracted to poorly managed compost bins. These visitors often indicate underlying problems with moisture, aeration, or improper materials.
Fruit flies breed in exposed, moist fruit and vegetable waste. Eliminate them by burying all kitchen scraps under browns and maintaining proper moisture levels. If fruit flies persist, temporarily stop adding fruit scraps or freeze them first to kill any eggs.
Rodents seek out food sources, especially protein-rich items like meat, dairy, and oily foods. Excluding these materials while maintaining a hot pile makes your compost unappealing to four-legged visitors. A secure, enclosed bin provides additional protection.
Troubleshooting Common Compost Odors
Different smells indicate specific problems, and identifying them helps you apply targeted solutions.
A rotten egg or sulfur smell signals anaerobic conditions from too much moisture and insufficient oxygen. Add browns immediately and turn the pile thoroughly to introduce air. A strong ammonia odor indicates too much nitrogen—add carbon-rich browns to restore balance.
Sweet or vinegary smells suggest fermentation rather than decomposition, often from compacted grass clippings or fruit waste. Break up clumps, add browns, and increase aeration. A musty or earthy smell is actually good—it means your compost is working properly.
| Odor | Cause | Solution |
|---|---|---|
| Rotten eggs | Anaerobic conditions, excess moisture | Add browns, turn pile, improve drainage |
| Ammonia | Too much nitrogen (greens) | Add carbon-rich browns |
| Vinegar/alcohol | Fermentation, lack of oxygen | Turn pile, break up clumps, add browns |
| Putrid/decay | Meat, dairy, or oily materials | Remove problem materials, add browns |
| Earthy/musty | None—this is healthy! | Continue current practices |
🌿 Seasonal Composting Adjustments
Your composting strategy should adapt to seasonal changes. Summer heat accelerates decomposition but also dries out piles quickly, requiring more moisture monitoring and occasional watering. The abundant green growth means you’ll need extra brown materials stockpiled.
Fall provides ideal composting conditions with moderate temperatures and abundant leaves—nature’s perfect brown material. Collect and store extra leaves in bags or bins to use throughout winter and spring when browns become scarce.
Winter slows decomposition in cold climates, but your pile continues working, albeit slowly. Insulate bins with straw bales or leaves to maintain some microbial activity. Continue adding materials, and they’ll break down rapidly once spring warmth returns.
Spring’s wet weather poses the biggest challenge for moisture management. Monitor your pile closely during rainy periods, adding browns liberally and ensuring adequate drainage. Cover your pile during heavy rains to prevent waterlogging.
Advanced Tips for Compost Perfectionists
Once you’ve mastered the basics, fine-tuning your system produces even better results. Adding accelerators like finished compost or garden soil introduces beneficial microorganisms that kickstart decomposition in new piles.
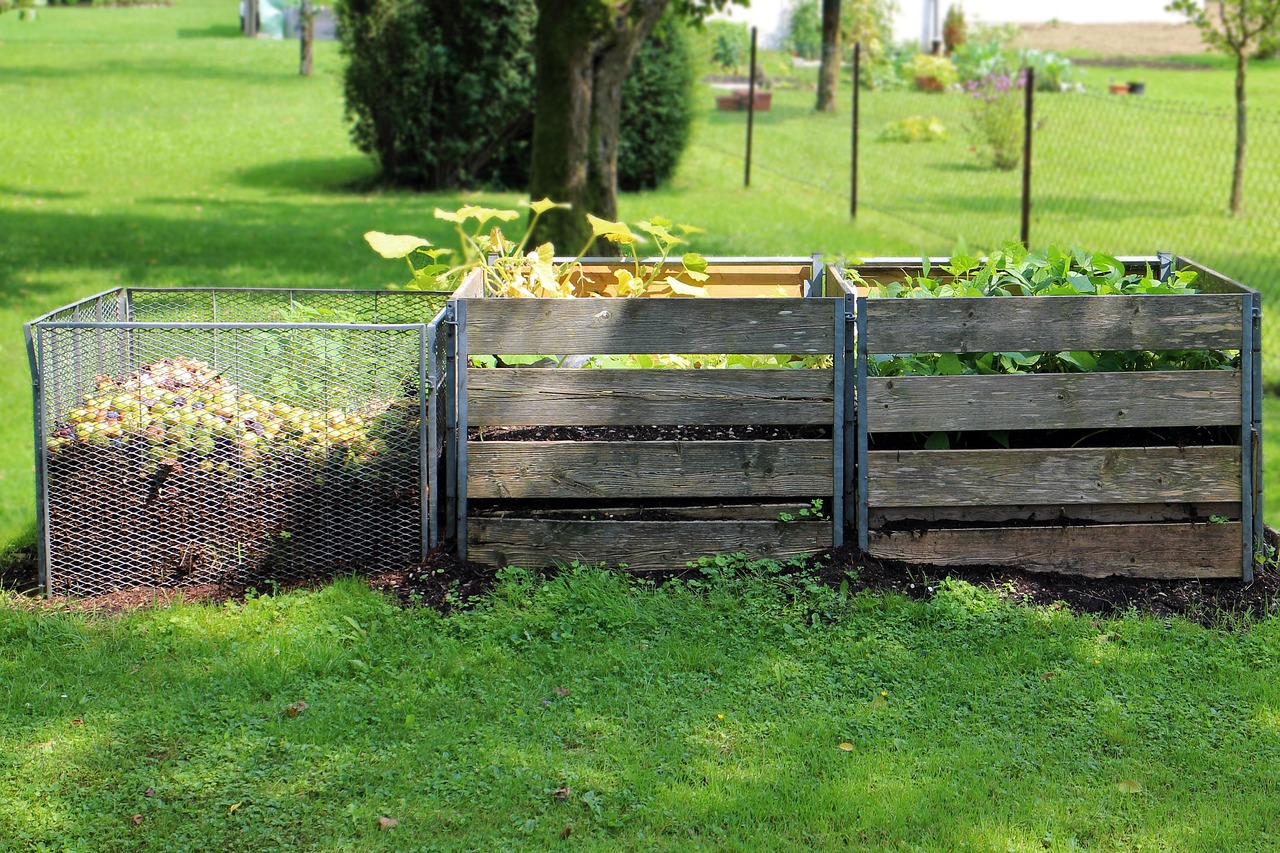
Creating a two or three-bin system allows one batch to mature while you build another. This rotation ensures a constant supply of finished compost while making pile management easier. Move partially composted material from the active bin to a curing bin where it finishes without requiring attention.
Some composters add biochar, rock dust, or small amounts of garden lime to improve finished compost quality and moderate pH. These amendments should be used sparingly and based on your specific soil needs.
Vermicomposting: The Indoor Alternative 🪱
For apartment dwellers or those wanting odor-free indoor composting, worm bins offer an excellent solution. Red wiggler worms consume kitchen scraps and produce nutrient-rich castings without the moisture and odor issues of traditional composting.
Properly maintained worm bins smell earthy and fresh, never foul. The key is feeding worms appropriate amounts—roughly their body weight in food weekly—and maintaining proper bedding moisture. Shredded newspaper and cardboard provide bedding that absorbs excess moisture while giving worms a home.
Avoid overfeeding, which causes food to rot before worms consume it. Bury food scraps under bedding rather than leaving them exposed. With minimal effort, vermicomposting produces premium compost for houseplants and gardens year-round.
Recognizing When Your Compost Is Ready 🎉
Finished compost looks, feels, and smells completely different from the materials you added. It should be dark brown or black, crumbly, and have a pleasant earthy aroma. Individual ingredients should be unrecognizable, transformed into uniform humus.
The time required varies from two months for hot, actively managed piles to a year or more for passive systems. Screen finished compost through hardware cloth to remove any remaining large pieces, returning them to your active pile for further breakdown.
Apply finished compost liberally to garden beds, containers, and lawns. This black gold improves soil structure, adds nutrients, increases water retention, and introduces beneficial microorganisms that suppress plant diseases.
Creating Your Composting Routine
Successful composting becomes second nature once you establish a simple routine. Keep a container in your kitchen for collecting scraps, storing extra brown materials near your bin for quick access, and setting aside a few minutes weekly for pile maintenance.
Take the “squeeze test” during each visit to check moisture levels. Give your pile a quick turn or poke aeration holes with a garden fork. Add browns as needed, especially after depositing kitchen scraps. These small, regular efforts prevent problems before they start.
Remember that composting is forgiving. If your pile becomes soggy, add browns. If it smells, add browns and turn it. If decomposition slows, add greens and moisture. With these basic principles, you’ll create beautiful compost that transforms your garden while keeping your bins fresh and odor-free.
Your journey toward perfect compost doesn’t require perfection—just attention to the fundamental balance of moisture, air, browns, and greens. Every challenge teaches valuable lessons, and every handful of finished compost rewards your efforts with improved garden health and the satisfaction of closing nature’s nutrient cycle right in your own backyard. Happy composting! 🌻